Comprehensive Tool Handle Replacement Guide
Contents
Imagine reaching for your trusty pliers, only to realize the handle has cracked or become slippery and uncomfortable. This situation is more common than you might think. Tools are an investment, and like any investment, they require maintenance. One of the most straightforward repairs you can perform is replacing the handles on your tools. This guide will provide you with everything you need to know about replacing tool handles, focusing on the tools you use most often.
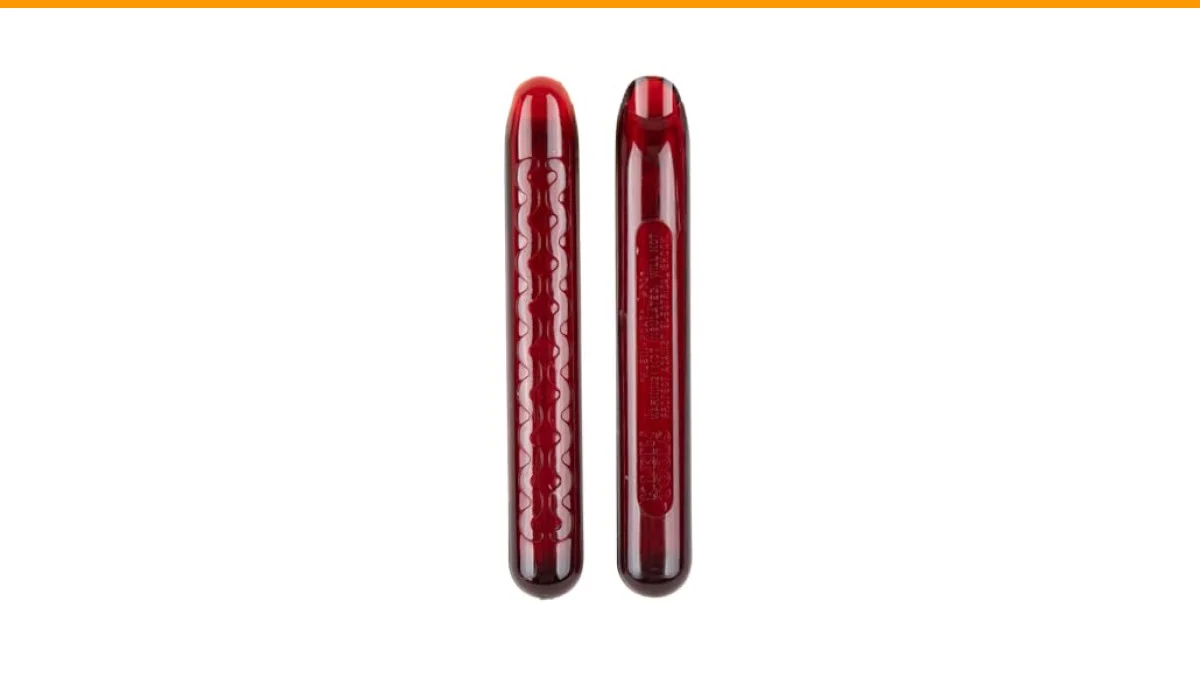
Replacing tool handles can extend the life of your equipment and enhance your comfort while working. A great option for pliers is the Klein Tools 89 Replacement Handles. This set is designed for 8 to 9-inch pliers, offering a slip-resistant grip that improves handling. Installation is easy, requiring only a few simple steps to ensure a secure fit.

KLEIN TOOLS
Klein Tools 89 Replacement Handles for 8 to 9-Inch Pliers
- Plastic replacement handles provide slip-resistant grip and enhanced comfort
- Fits on existing pair of 8-Inch to 9-Inch plier handles
- To install, place open end of grip in hot tap water to within 1-Inch of plugged end for approximately one minute, then drive grip…
Understanding the Importance of Tool Handle Replacement
Tool handles wear out over time. Factors like moisture, heat, and frequent use contribute to their deterioration. A smooth, comfortable grip is crucial for effective tool use, as a worn handle can lead to slippage and even injury. Replacing handles proactively can save you money and improve your experience.
Steps for Replacing Tool Handles
Here’s a step-by-step guide to replacing handles on your tools. These steps can vary slightly depending on the type of tool, but the general process is similar.
- Gather Your Materials: You’ll need replacement handles, a heat source (like hot tap water), and a mallet or hammer.
- Remove the Old Handles: If the handles are glued or stuck, gently twist them off. You may need to use a utility knife to cut through any adhesive.
- Prepare the New Handles: For plastic handles like those from Klein Tools, heat the open end in hot tap water for about one minute. This will soften the material and make it easier to install. Do not use boiling water.
- Install the New Handles: Once heated, push the new handles onto the tool’s handle. Use a mallet to tap them into place if needed. Ensure they are securely attached.
- Let Them Set: Allow the handles to cool and set for a few minutes before using the tool again.
Pro tip: Always check the manufacturer’s instructions for specific guidance on replacement methods.
Comparing Different Replacement Options
Different tools may require different types of handles, and understanding your options can help you make the right choice. The following table compares common handle replacement methods:
| Handle Type | Material | Installation Method | Best For |
|---|---|---|---|
| Plastic | Thermoplastic | Heat softening and pushing on | Pliers, side cutters |
| Wood | Hardwood | Fitting into place, often with glue | Hoes, shovels |
| Rubber | Rubber compound | Adhesive or heat shrink | Hammers, screwdrivers |
| Metal | Aluminum or steel | Bolting or welding | Heavy-duty tools |
Frequently Asked Questions
How do I know when to replace my tool handles?
Inspect your handles regularly. If they feel slippery, cracked, or uncomfortable, it’s time for a replacement.
Can I use any handle for my tools?
Not all handles fit all tools. Ensure you choose handles specifically designed for your tool model and size.
What tools require handle replacement?
Common tools include pliers, shovels, hammers, and garden tools. Any tool with a worn or damaged handle can benefit from replacement.
Is it worth replacing handles on old tools?
Yes. Replacing handles on old tools can save you money and improve functionality, making them usable for years to come.
Where can I buy replacement handles?
Replacement handles can be found at hardware stores, specialty tool shops, or online retailers like Amazon.
Final Thoughts on Tool Handle Replacement
- Regularly inspect your tools for wear and tear.
- Choose the right replacement handles that fit your tools.
- Follow installation instructions carefully to avoid future issues.
- Consider the material of the handle when making your selection.
- Keep your workspace organized to facilitate easier tool maintenance.
- Consult expert guides for specific tools if needed.
- Replace handles as a proactive maintenance step to extend tool life.
With a little effort, you can effectively replace your tool handles and ensure they remain functional and comfortable for years to come. For more tips on organizing and maintaining your tools, check out our guide on garden tool organizers.
For further reading on replacing wooden handles specifically, you might find this expert guide helpful.