
How to Use a Soil Test Kit: A Comprehensive Guide
Contents
Understanding Soil Testing
Gardening often comes with its challenges, especially when it comes to knowing how to provide the best care for your plants. One common issue is not understanding the state of your soil. Many gardeners assume that if plants are growing, the soil must be fine. This assumption can lead to problems down the road. Testing your soil is crucial to ensure optimal growth conditions for your plants, and this is where a soil test kit becomes invaluable.
In this guide, you’ll learn how to use a soil test kit effectively, what to look for in your results, and how to take actionable steps based on those results. With this knowledge, you can enhance your gardening experience and cultivate healthier plants.
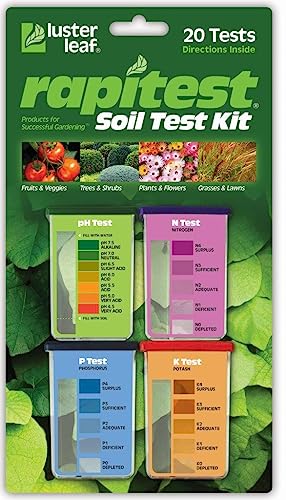
Luster Leaf
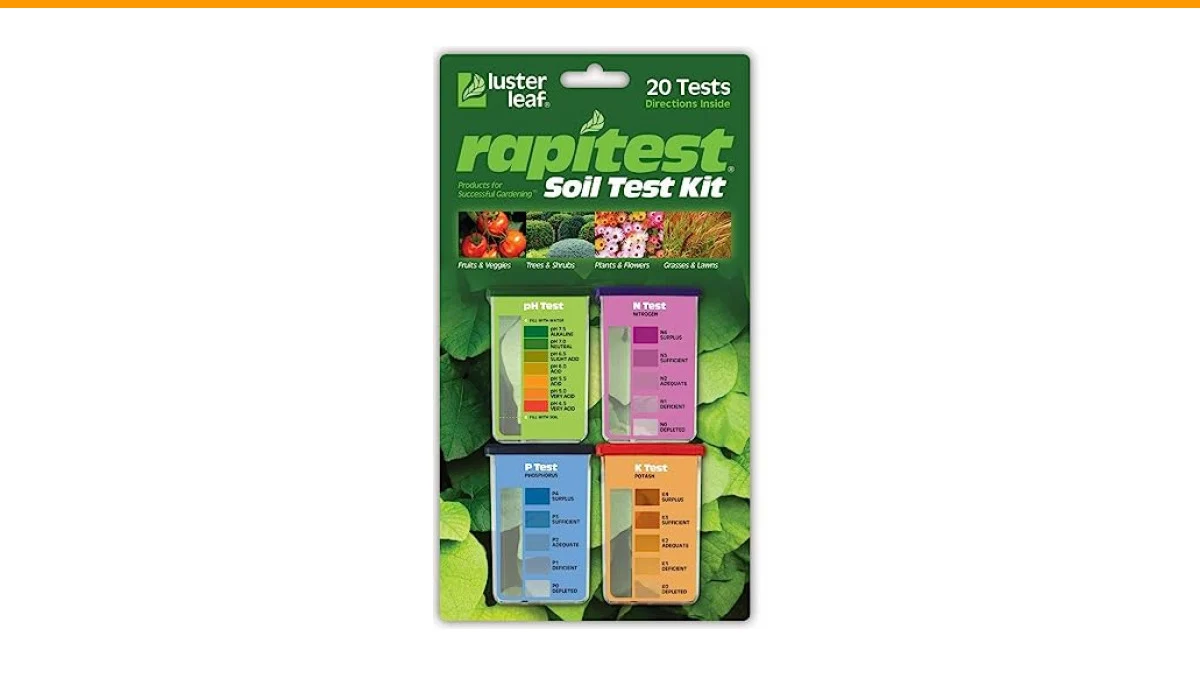
Rapitest Soil Test Kit for Gardens, Vegetables, Flowers and Lawns. USA designed and assembled soil tester completely, quickly and accurately measures/analyzes soil pH acidity and garden nutrients.
- Quick, at home results for Soil pH, Nitrogen, Phosphorous and Potash Innovative and inexpensive soil test kit features an easy-to-…
- Contains all components needed for 20 tests. 5 for each of pH, N, P and K
- Contains all components needed to test all variables in several spots in the yard or garden
The Rapitest Soil Test Kit is an excellent choice for beginners and seasoned gardeners alike. It measures vital soil properties including pH, nitrogen, phosphorus, and potassium quickly and accurately, allowing you to understand your soil’s health with minimal effort.
Why Test Your Soil?
Many gardeners overlook soil testing, believing that their plants will thrive without it. However, soil testing provides essential information that can dramatically affect plant health. Here are a few reasons why you should consider testing your soil:
- Identifies Nutrient Deficiencies: A soil test reveals if your soil lacks key nutrients like nitrogen, phosphorus, or potassium.
- Determines pH Level: Knowing the pH level helps you understand if your soil is too acidic or alkaline for specific plants.
- Improves Fertilization: Test results guide you in selecting the right fertilizers and amendments to optimize growth.
Ignoring these factors can lead to stunted growth or even plant failure. Testing your soil could be the difference between a thriving garden and a struggling one.
How to Use a Soil Test Kit
Using a soil test kit is a straightforward process. Below, I’ll walk you through the critical steps:
- Gather Your Materials: You’ll need your soil test kit (like the Rapitest), a clean container for collecting soil samples, and a trowel or spade.
- Collect Soil Samples: Take samples from different areas of your garden to get a representative sample. Remove debris and collect soil from the top 6 inches. Aim for about 1 cup of soil per sample.
- Prepare the Soil: Break up any clumps in the soil and remove any visible roots or debris. Ensure the soil is dry for more accurate results.
- Follow Instructions: Open your soil test kit and follow the instructions carefully. For example, the Rapitest kit uses capsules and color comparators for easy reading of results.
- Record Results: Take note of your soil’s pH and nutrient levels. Most kits will provide a color chart for comparison.
- Analyze and Amend: Use the results to amend your soil. For example, if your soil is too acidic, you might add lime. If nutrient levels are low, consider appropriate fertilizers.
Testing your soil can take just a few minutes, but the benefits last a whole growing season.
Common Misconceptions About Soil Testing
Myth 1: Soil Testing is Only for Professional Growers
Many believe soil testing is reserved for experts or commercial farmers. In reality, anyone who gardens can benefit from understanding their soil. Whether you have a small vegetable patch or a large flower garden, knowing your soil composition can enhance your gardening efforts.
Myth 2: One Test is Enough
Another common belief is that one soil test suffices for years. Soil conditions change due to factors like weather, plant consumption, and added amendments. Regular testing—at least every year or two—ensures that you’re addressing any emerging nutrient deficiencies or pH changes.
Comparison of Soil Test Kits
| Test Kit | Number of Tests | Tests for | Ease of Use |
|---|---|---|---|
| Rapitest Soil Test Kit | 20 | pH, N, P, K | Very Easy |
| LaMotte Soil Test Kit | 50 | pH, N, P, K | Moderate |
| Soil Savvy Soil Test Kit | 1 | Comprehensive Nutrient Analysis | Easy |
| Gardner’s Supply Soil Test Kit | 10 | pH, N, P | Easy |
While the Rapitest kit offers a balance of ease and comprehensive tests, other kits may offer more extensive testing but with increased complexity.
Frequently Asked Questions
What does a soil test kit measure?
A soil test kit typically measures pH, nitrogen, phosphorus, and potassium levels. Some kits can also analyze additional micronutrients.
How often should I test my soil?
It’s recommended to test your soil every 1-3 years, depending on how often you amend your soil and the types of plants you grow.
Can I use a soil test kit for potted plants?
Yes, you can use a soil test kit for potted plants. Collect soil samples from your pots and follow the same testing procedures.
What should I do if my soil is too acidic?
If your soil is too acidic, consider adding lime to raise the pH. The amount will depend on your soil type and test results.
Are home soil test kits accurate?
Home soil test kits, like the Rapitest, are generally accurate when used correctly. For the best results, follow the instructions carefully.
Actionable Steps for Better Gardening
- Test your soil annually for accurate nutrient levels.
- Collect samples from various spots in your garden.
- Use a reliable kit like the Rapitest for quick results.
- Follow the kit’s instructions for the best accuracy.
- Record your results for future reference.
- Amend your soil according to the test results.
- Stay informed about your plants’ specific soil needs.